Tuesday, June 19, 2012

Strawberry Jam


If you’re new to canning, this is a great thing to start with since it’s fairly straightforward and the end result is both yummy and beautiful to behold.


Also, the smell that will fill your house while you’re simmering the jam on the stove is nothing short of divine – so sweet and summery it almost makes you want to cry. This smell stands in stark contrast to the intensely vinegary odor that pervades every nook and cranny of your house when you pickle foods — that smell will also make you want to cry, but not in a good way…

A few notes before you begin:

Don’t skip the macerating step if possible. If you don’t have time to let them sit overnight, even an hour is better than nothing.

And don’t cut any corners on your fruit – preserve the freshest and best berries you can find!


This recipe is adapted from a few sources including one of my favorite books, Put ‘Em Up by Sherri Brooks Vinton as well as the divine strawberry vanilla jam recipe in Marisa McClellan’s wonderful new book, Food in Jars: Preserving in Small Batches Year-Round

The recipe below yields a sweet, flavorful, beautiful red jam that is nice and thick (not thin and syrupy like preserves).


Strawberry Jam

Makes 6 pint jars

Ingredients

* 16 cups cleaned, hulled, halved (or chopped, depending on the size) strawberries
* 6 cups granulated organic sugar
* 8 tablespoons powdered pectin
* 1/2 cup organic lemon juice (you can squeeze your own but for projects like this, I buy organic lemon juice in the little squeeze bottles, even the organic stuff is cheap (under $1.50 a bottle) and it saves some time)


Directions

1. Combine the strawberries and 2 cups of the sugar in a non-reactive pot. Let the mixture sit at room temperature until the sugar begins to pull the liquid out of the berries, about 15 to 30 minutes, then cover and refrigerate over night (this is called maceration.) If you don’t have time to wait that long, let sit for an hour or more.

2. When you’re ready to jam out, prepare a boiling water bath and 6 wide mouth pint jars, lids and bands (you can also use a combination of half-pint and pint jars if you prefer – we canned some of ours in the smaller jars as sometimes it’s nice to have the option of a smaller jar) according to the directions outlined here.

3. Take the macerated berries out of the fridge and put them and the rest of the ingredients in a large non-reactive pot (you may want to use a larger pot than you think you’ll need since the jam is going to boil and foam quite a bit and a bigger pot can help you prevent boiling over which gets very sticky when you’re dealing with this amount of sugar).

4. Bring to a boil over high heat (this jam will foam like crazy) and cook on high heat, stirring regularly for 15 to 20 minutes, until it takes on a thick, syrupy consistency. If you have an immersion blender, use it at this point to puree some of the fruit to whatever consistency you desire. If not, you can use a blender to puree about a third of the jam.

5. Let the jam boil vigorously until it reaches 220 F (105 C). If you don’t have a candy thermometer, you can judge that it is done when the bubbles begin to look thick and syrupy. You can also see if it’s sheeting — dip a spoon in the jam then hold it up and let it drip back into the pot – if the drips fall singly and seem liquid-y, it needs to cook longer. But if the drips have begun to run together and form a sheet as they drip, you’ve achieved your set and can stop cooking.

6. Remove the pot from the heat and ladle the jam into your prepared jars. Wipe the rims with a clean, wet cloth, apply the lids and rings and process in a boiling water bath for 10 minutes. Remove from the boiling water bath with your jar lifter and set in a draft-free place on a towel to cool. Don’t let the jars touch each other as they’re cooling.

7. The jars should begin to make a most delightful pop or ping noise ans the seal forms, pulling the centers of the lids down and making them slightly concave. Once the jars have cooled for 24 hours, you can check the seals by removing the bands. Grasp the jar by the edge of the lid and lift gently an inch or two off the towel-covered countertop. The lid should hold fast. If it does not hold, refrigerate the jam and use it within two weeks. If it does, store in a cool, dry place for up to a year.


Monday, June 18, 2012

Make Your Own Rose Petal Honey


On her last day in India, Gardenistacontributor, Maria had her first taste of rose petal honey. Back home, she couldn’t forget the taste—sensual, sublime, exotic, and familiar all at once, like India. Here, she shares her simple recipe to make your own. For the full story, go to DIY Rose Petal Honey on Gardenista.

Above: Virtually all roses are safe to eat; just make sure they’re organically grown (pesticide-free). From a friend’s rose garden, Maria picked a variety, washed and dried them, then placed petals from about six roses in a quart-size canning jar. She then poured 1 and a half pounds of local honey over the petals.


Above: You can experiment with the proportion of petals to honey, depending on how strong you want the infusion to taste.


Above: Maria recommends allowing the honey to steep for two weeks in a cupboard, turning the mixture every five days (as the petals tended to float to the top). Next, I strained out the petals in a colander, mashing the roses with a wooden spoon to wring out more honey. I poured the honey back into the jar; I use it on yogurt and scones, or as a condiment for cheese plates.

For more natural recipes and DIY inspiration, see Gardenistas posts Instant Summer Hammock and The Grow Bag, Beautified.


The Truth About Salt

The Truth About Salt

Insidious health threat, or innocent flavor enhancer? Take a closer look at the planet’s tastiest mineral
 
By Maria Masters, Men’s Health


America has declared war on salt. The nutrition militia, claiming that the enemy is attacking you and your buddies, points to hypertension stats: More than 20 percent of American men between 35 and 44 have high blood pressure. Even the Institute of Medicine is leaning on the government to set standards for sodium content in foods; and the American Heart Association, along with the City of New York and 30 other cities, is promoting a new National Salt Reduction Initiative.
So should you enlist? It’s a tough battle. “If people want to avoid salt, they really can’t—not unless they skip processed, prepared, and restaurant foods,” says Marion Nestle, Ph.D., M.P.H., a professor of nutrition, food studies, and public health at New York University.
20 Little changes you can make today for a healthier life.
What’s more, salt may not even be the true enemy. Before you sign up to fight, tune out the hysteria and plunge into the latest nutrition intel.

Can I live without salt?

Nope
Salt is essential to health. Your body can’t make it, and your cells need it to function, says Aryan Aiyer, M.D., director of the heart center at Magee-Womens Hospital at the University of Pittsburgh medical center. In fact, the Institute of Medicine recommends consuming at least 3.8 grams of salt a day (just over 1/2 teaspoon), mainly for the sodium.
Eat this, not that: The 30 saltiest foods in America.
Sodium is an electrolyte, a humble member of that hyped class of minerals that help maintain muscle function and hydration; that’s why sport drinks contain sodium. You’re constantly losing sodium through sweat and urine, and if you don’t replenish that sodium and water, your blood pressure may drop far enough to make you dizzy and light-headed. “Sodium acts like a sponge to help hold fluids in your blood,” says Rikki Keen, R.D., an adjunct instructor of dietetics and nutrition at the University of Alaska.
However, people who chug too much water can lower their sodium levels so far that they develop hyponatremia, a potentially deadly condition more common among recreational exercisers than professional athletes, says Marie Spano, R.D., a sports nutritionist in Atlanta. Salt does more than just make our food taste good; without it, we’d die.

Do I need to watch my salt intake like a hawk?

Not necessarily
If you have high blood pressure, you’ve probably been advised to cut back on salt. The mechanism seems clear: Sodium causes your blood to hold more water, so your heart has to pump harder, making your blood pressure rise. If your blood pressure is already high, that’s a problem. (A high intake of salt can also be dangerous for people who are salt-sensitive—that is, they have trouble excreting excess salt.)
20 Ways to beat high blood pressure.
What if you’re a healthy guy? The Institute of Medicine is adamant in recommending that people ages 14 and over consume no more than 2,300 milligrams of sodium a day—about a teaspoon of salt. The Institute of Medicine sets a lower limit (1,500 milligrams, or slightly more than 1/2 teaspoon) for middle-aged and older adults, African Americans, and people with kidney disease, hypertension, or diabetes.
But even though the average American blows past both limits, consuming an average of 3,400 milligrams of sodium a day, some experts say that’s not a problem for most men. “I don’t know of any evidence that suggests that healthy men with normal blood pressure should reduce their sodium intake,” says Michael Alderman, M.D., a professor of medicine at Yeshiva University.
For starters, reducing the salt content of your diet could adversely affect your health, Dr. Alderman says. In a study review published in the Journal of Hypertension, people who reduced their sodium intake by about 1,000 milligrams experienced lower blood pressure, but also higher heart rates and decreased insulin sensitivity, which can raise diabetes risk. Because of these effects, he says, we need clinical trials to determine whether lowering salt intake actually improves health outcomes in the general population.
And let’s not forget that sodium isn’t the only blood-pressure booster. “The huge message everyone overlooks is that being overweight also contributes to high blood pressure,” says Spano.

Can anything I eat counteract the effect of salt on my BP?

Yes
Quick biology lesson: Your body is constantly balancing the sodium on the outside of each cell and the potassium on the inside. A 2006 statement from the American Heart Association in the journal Hypertension revealed that an increase in potassium can lower blood pressure just as much as a decrease in sodium can. Even the Institute of Medicine doesn’t deny this: “The sodium:potassium ratio is typically more closely associated with blood pressure than with intake of either substance alone.”
Unfortunately, supersalty processed meals tend to crowd out our main dietary sources of potassium—fresh fruits and vegetables. Nutrition surveys reveal that younger men consume only about 60 percent to 70 percent of the recommended daily intake: 4,700 milligrams of potassium. Imagine the effect on our blood pressure levels if fast-food cashiers always asked, “You want broccoli with that?"

Should I cut back on salt when I cook?

Don’t bother
Tossing some salt into your pasta water isn’t likely to send your blood pressure soaring. That’s because 77 percent of the sodium in the average diet comes from processed and restaurant foods, according to the Centers for Disease Control and Prevention. Only 12 percent of sodium is naturally occurring in foods, and just 5 percent comes from home cooking.
So there’s no need to ban salt from your house or buy an additive-laden salt substitute—especially since salt is an important seasoning and the only natural source of that basic taste, says Harold McGee, the author of On Food and Cooking. After all, our brains evolved to crave salt because it’s necessary for survival, says Leslie Stein, Ph.D., a senior research associate at Monell Chemical Senses Center, in Philadelphia. Salt creates a fuller mouthfeel when you eat, while suppressing bitterness and releasing sweetness. In fact, without a decent hit of salt, many foods would taste flat, not flavorful. It’s also essential in the chemistry of baking, says Stein. Stick with kosher salt for cooking and try flaky sea salt for finishing a dish; both types are free of additives.

Why are so many processed foods packed with salt?

It’s complicated
Sure, salt makes food taste good. But that’s not the only reason fast-food meals and processed foods are laced with it.
For starters, people become hooked on the flavor profile of familiar products, says Howard Moskowitz, Ph.D., a food scientist and cofounder of the journal Chemical Senses. “They’ve become accustomed to this richer, deeper taste due to salt. Take out the salt, and people will complain and stop buying the product.”
Salt also masks off-flavors created during the production of processed foods while acting as a preservative and improving texture and color. And let’s face it, where else can a $600 billion industry find an ingredient that can do so much, so cheaply? Whether or not salt itself is dangerous for you, it can definitely run with a bad crowd.

10 Smart Uses for Salt

10 Smart Uses For SALT


Although doctors and nutritionists advise controlling your salt intake, there are many other ways in which you can put it to good use. Some simple and useful ideas:


1. Add 1 cup of salt to your laundry load when washing deep-colored fabric or towels, for the first few times. The saline solution helps set the pigment, so that color doesn’t bleed and clothes don’t fade.

2. If you’ve just bought shower curtains, soak them for a few hours in your bathtub in about 4 inches of water and a cup of salt. Then hang the liner without drying it. The salt forms an invisible coating on the shower curtain, protecting it from mildew. Repeat this treatment every three months for best results.

3. Mix one tsp. of salt with 1 cup of water. Dip a cloth napkin in this solution, wring it and wrap it around leftover wedges of cheese. Put the wrapped cheese in the refrigerator. Thanks to the salt crystals, your cheese will stay mold-free!

4. Got gunk on your steam iron? Spread out a sheet of wax paper, and sprinkle some salt over it. Now heat your iron for a couple of minutes, switch off the steam setting, and run it over the wax paper. The sticky residue will come off easily, thanks to the abrasive salt granules and the heat.

5. Salt is a natural anti-microbial agent. If you add a pinch or two of it to the water in your flower vase, the blooms will stay fresh longer.

6. Mix a little salt with sesame oil or mustard oil in the center of your palm. Now dip your finger into the salted oil, and give your gums a gentle massage with it. The result: strong gums and shiny pearls!

7. Rinsing your mouth with salted water brings relief from toothache, even if only for a while. That’s because salt draws out the germs from an abcess and drains it away. The result: relief!

8. Salt also assuages minor burns. Make a thick paste of salt and water and apply it all over the affected area. The inflammation will reduce quickly.

9. Come summer, and ants start creepin’ up window sills. Sprinkling a little salt keeps them away.

10. Soak walnuts and pecans in salted water for a couple of hours, and you’ll find that they shell more easily.


All About Arugula

All About Arugula

Also known as rocket, rucola, or roquette, this peppery green has been cultivated in the Mediterranean for thousands of years. With high levels of potassium and vitamins A and C, arugula is a nutritional powerhouse. It makes more of a punch, flavor-wise, than most other leafy greens, which lends itself nicely to a variety of dishes. Click through to check out just some of the ways to use arugula, and see below for some basics on this tasty green.

Shopping Tips

The best arugula is uniformly dark green, with no yellowing or wilted leaves.

Cleaning Tips

Odds are, you may notice a little dirt or grime on your arugula. That’s fine, though, because doesn’t say much about the quality of the product. If you’ve purchased loose leaves, cut off the stems and rinse the leaves in a bowl under cool running water. If your arugula is in a bunch, place it in a bowl of cool water for about 10-15 minutes. Drain leaves in a colander, and rinse.

Storage Tips

Wrap cleaned leaves in a paper towel and place in a plastic zipper storage bag. They should stay fresh for about a week; unwashed arugula only keeps for a few days.

Size Matters

All arugula is not created equal. Smaller, younger leaves have a milder flavor, whereas larger, older leaves pack more of a punch. Get to know the difference when choosing leaves for a recipe — you’ll likely find that you prefer one flavor over another. I, for instance, prefer the younger leaves in pesto and salads, but would pick older leaves for pizza or soup any day of the week.

Arugula & Pesto Crostini

Arugula and pesto are a great base for a fantastic crostini. The key here is to experiment: check out some ideas for add-ons below!

Ingredients:

  • 1 baguette
  • 2-3 tbs. pesto
  • About 2 cups fresh arugula
  • Olive oil

Optional Add-Ons:
- Fresh mozzarella, ricotta or blue cheese
- Tomato slices
- Sautéed mushrooms
- Green peas

Instructions:
1. Preheat oven to 350 degrees. Cut baguette into about 1/2″ thick slices, and lightly brush with olive oil. Bake for about 8 minutes.
2. After slices have cooled, brush with pesto, top with arugula and any other desired toppings

Broccoli Arugula Soup

You know when you’ve been out of town for a while and you can’t remember the last time you ate real, wholesome food? This soup is the perfect remedy for that. As good hot as it is cold, this gluten-free and vegan soup is sure to delight and refresh.

Ingredients:

  • 1 tbs. olive oil
  • 1 clove garlic, chopped
  • 1/2 yellow onion, diced
  • 1 head broccoli, cut in small florets
  • 2 1/2 cups water
  • 3/4 cup arugula
  • Coarse salt and pepper to taste
  • 1/4 teaspoon thyme (optional)
  • Lemon slices for serving

Instructions:
1. In a large saucepan, heat oil over medium. Add onions and sauté until translucent. Add garlic and sauté for another minute or so. Add broccoli and cook until it is bright green, about 4 minutes. Add water, salt and pepper, and thyme to taste. Bring to boil, then cover and lower heat. Cook until broccoli is tender, around 8 minutes.

2. Carefully** pour soup into blender and add arugula, blending until smooth. Serve with lemon slices.

** If the idea of blending a hot liquid in the blender makes you nervous, you can blend in batches of 2, 3 or 4, and set aside the blended soup in large saucepan over low heat. You can also, if you wish, let the soup cool for 5-10 minutes before blending and warm on the stovetop afterwards

Other Great Ways to Use Arugula:

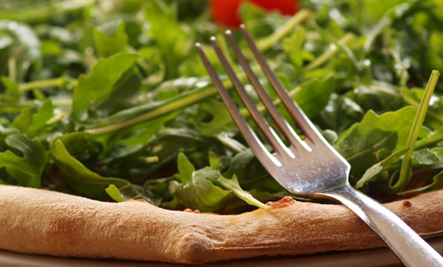
3. As a pizza topping! Make sure to put in on after the pizza has baked.

4. Use it in a pesto. It’s a fantastic (and healthy!) pasta topping, for example. You can also use it as a tasty condiment for a sandwich. Check out the recipe here.

5. As a punchy alternative to regular lettuce in sandwiches.

6. Ditch the bottle! Check out this fantastic recipe for homemade arugula salad dressing.

7. Want to consume your arugula in drinkable form? Look know further than this recipe for an arugula gimlet


Many of us are chomping at the bit for basil season — I know I am! I can’t wait to get my fill of caprese salads, bruschetta, pastas, and anything and everything topped with fresh, homemade pesto. But, in the meantime, let’s spare ourselves the agony of counting the days until we have more basil than we know what to do with. Rather, make some pesto with a leafy green that’s actually in season. This recipe for arugula pesto will definitely knock your socks off!

You can certainly follow your favorite basil pesto recipe and substitute arugula for the basil. However, I found that, in the arugula pesto, I didn’t need as much garlic and pepper as I would use for basil pesto. Moreover, a spritz of lemon juice will nicely mask any unappealing grassy taste.

Arugula Pesto

Ingredients:

  • 4 cups packed arugula (baby arugula is best here!)
  • 1/4 cup olive oil
  • 1/4 cup pine nuts
  • 1/4 cup Parmesan (optional)
  • 1 garlic clove, peeled
  • Salt and pepper to taste
  • Lemon juice to taste

Instructions:
1. Place arugula, pine nuts, garlic and parmesan in a food processor. Blend until nearly smooth, adding the olive oil in gradually while it’s running.
2. Serve within a day at room temperature

Salads

Perhaps the most popular way to enjoy arugula is in a salad; it is a leafy green, after all! That doesn’t mean, though, that an arugula salad has to be boring. No, not by any means. Check out a fantastic variety of arugula salad recipes:

Balsamic Strawberries & Arugula

Ingredients:
3 cups strawberries, quartered
1 tablespoon balsamic vinegar & more to taste
Freshly ground black pepper
4 cups arugula
Salt to taste
1 tbs extra virgin olive oil

Instructions:
1. In a large bowl, toss berries with vinegar and pepper. Set aside for about 10 minutes.
2. Add arugula to strawberries and sprinkle salt over the bowl. Toss. Drizzle olive oil over berries and arugula and gently toss again. Serve.

What barbecue is complete without a big bowl of fresh watermelon slices? This, though, can be both a blessing and a curse — with a summer stuffed full of outdoor grilling, the ubiquitous treat can get a little tired. So, instead of just cutting up a watermelon and calling it a day, why not put a new spin on it? Check out this fantastic recipe for watermelon and arugula salad — it’ll be a perfect addition to your Memorial Day weekend festivities!

Watermelon and Arugula Salad

Ingredients:

5 cups arugula, packed
8 cups watermelon, cubed
1 1/3 cups feta cheese
1 tbs fresh mint, chopped
1 tbs balsamic vinegar
1 tbs olive oil
Salt and pepper to taste

Instructions:

1. Whisk oil and vinegar in a small bowl. Place arugula, watermelon and feta in a large bowl, and drizzle vinegar and oil mixture and chopped mint over it. Toss.

2. Refrigerate for about 15 minutes before serving.


I love simple flavors, but I also adore an explosion. This jumble of sweet, salty, spicy, and nutty in a tangle of peppery greens leaves me swooning. We may not be inventing the wheel here—the fruit/nuts/cheese salad has been around for a while—but this arugula salad with pears, gorgonzola, spicy caramelized walnuts and maple-Dijon vinaigrette has a few twists (like cayenne and maple) that make it stand out from the crowd.

Sweet and Spicy Autumn Salad

For the Dressing
2 tablespoons maple syrup
2 tablespoons Dijon mustard
2 teaspoons olive oil
2 teaspoons balsamic vinegar

For the Walnuts
1 cup walnuts
Splash of olive oil
1 tablespoons honey
1 tablespoon maple sugar (or
sweetener of your choice)
1/2 teaspoon salt
1/4 teaspoon ground black pepper
Generous pinch of cayenne pepper, to taste

For the Salad
10 cups loosely packed arugula
2 pears, peeled and thinly sliced
3 ounces gorgonzola

1. Combine dressing ingredients in a jar and shake until combined.
2. Preheat oven to 325 F.
3. Wipe a baking sheet with olive oil.
4. Combine walnuts and remaining walnut ingredients in a bowl and mix to coat.
5. Spread nut mixture on prepared baking sheet and bake for 15 minutes, or until nuts are deep golden and bubbling, stirring occasionally.
6. Add arugula, pears, gorgonzola and walnuts to large bowl and toss with some dressing. The dressing is strong so a little goes a long way.

Serves 4 to 6.


This salad makes a good meatless main dish or a great side to accompany a mezze of yummy things like hummus, quinoa, cucumber-yogurt salad, and pickled beets. Enjoy!

Warm Spiced Chickpea Salad with Arugula
Serves 4 as a side or 2 as a main dish

Ingredients

  • 3 tablespoons extra virgin olive oil
  • 1 tablespoon minced peeled fresh ginger
  • 1 tablespoon minced garlic
  • 1/2 teaspoon cumin seeds
  • Dash of red pepper flakes
  • Sea salt and freshly ground black pepper
  • 1 1/2 cups cooked or drained canned chickpeas
  • 1 tablespoon rice wine vinegar
  • 1 teaspoon honey
  • 4 cups arugula leaves
  • 1 small red onion, halved and thinly sliced
  • 4 hard-cooked eggs, quartered

Directions

1. Put the olive oil in a deep skillet over medium heat. When hot, add the ginger, garlic, onions, red pepper flakes, and cumin seeds and cook, stirring constantly, until the ginger and garlic are fragrant and the onion is soft, 1 to 2 minutes. Sprinkle with salt and pepper, then stir in the chickpeas until hot and coated in the oil and seasonings, about 3 minutes more.
2. Remove from heat and with a fork, stir in the vinegar, honey, and 1 tablespoon water. Mash a few of the chickpeas as you stir to add texture to the dressing. Put the arugula and red onion in a large bowl and toss with the warm chickpea dressing. Taste and adjust the seasoning. Serve immediately, garnished with hard-cooked eggs.

Grilled Peaches, Bitter Greens, and Goat Cheese Salad


60g/1/2 cup pecans
4 firm, ripe freestone peaches, halved and pitted
45ml/2 1/2 tablespoons extra-virgin olive oil
Salt and freshly ground pepper
15ml/1 tablespoon sherry vinegar
85g/3 ounces arugula, large stems discarded
One head frisée, torn into bite-size pieces (4 cups)
85g/3 ounces Cabrales cheese (or goat cheese), crumbled (1 cup)
1. Light a grill. Put the pecans on a sheet of aluminum foil and fold into a small pouch. Place on the grill and toast for 7 minutes, or until they are golden brown. Transfer the pecans to a plate and let cool, then coarsely chop.
2. In a medium bowl, toss the peaches with 1/2 tablespoon of the olive oil and season with salt and pepper. Grill the peaches over a medium-high fire until softened and lightly browned, about 5 minutes per side. Transfer the peaches to a work surface and cut each half in half.
3. In a medium bowl, mix the vinegar with the remaining 2 tablespoons of olive oil and season with salt and pepper. Add the arugula and frisée and toss well. Transfer the salad to a platter and scatter the blue cheese and toasted pecans on top. Arrange the peaches around the salad and serve.
SERVES: 8
Prep time: 10 minutes
Grilling time: 20 minutes

Green Advice: Most of these ingredients can be purchased from local organic farms can also provide fruit from the closest possible sources.